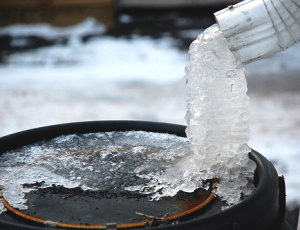
Preparing Your Rain Barrel & Compost Bin For Winter
By Christine McLean, Eco Promotional Products, Inc.
Your garden is a great place to practice water conservation and recycling; Rain barrels and compost bins are two of your best choices. At home, a rain barrel is simple to install under a downspout. You will be amazed at how quickly it will fill up during even the lightest rains, providing necessary water for your garden, without turning on your hose. And utilizing a compost bin for your food scraps is a great way to keep food waste out of our landfills while making cost free nutritional fertilizer for your plants!
Rain barrels and compost bins are easy to maintain, however, there are a few extra steps you need to take in the colder months to ensure you’ll benefit from both.
Protecting your rain barrel:
If you live in an area where it freezes in the winter, you’ll want to take precautions to extend the life of your barrel. A freeze can damage the barrel, valve and any overflow piping you have connected. Before the temperatures drop, following the steps below will help avoid costly expenses next spring!
Step One: Disconnect from downspout. Some rain barrels are connected directly into the barrel, some have diverters and others are simply placed beneath the downspout. If yours isn’t attached, move to step two.
Step Two: Drain your barrel. While draining, disconnect overflow piping and clean any screens or filters that are in place. Remember, the average rain barrel weighs 500 pounds full and should be drained before attempting to move it.
Step Three: Check for sediment. Once all of the water is drained, there may be organic matter that remains at the bottom of the barrel. You’ll want to remove this so it doesn’t clog your drain come spring. Rinse with water and dump upside down over a mulch bed or non-grassy area. This organic matter will be great for your garden!
Step Four: Leave the spigot open. This will avoid freeze damage to the hardware of the barrel.
Step Five: Store your barrel. Storing your barrel in a shed, garage or basement is ideal and will extend the life of your barrel. However, it will do just fine outside as long as it is upside down so Winter snow or rain can’t accumulate. If stored outdoors, it can also be covered with a tarp for extra protection.
Step Six: Reconnect the downspout. The last step will be to reconnect the piece of downspout that was removed to fit your barrel. You don’t want to have water streaming directly down into the ground as this will cause erosion and possible damage to your foundation. It’s best to direct water away from your house and helps it spread out.
Protecting your compost bin:
A compost bin can be left out even in the coldest of winters. With just a few steps, you can guarantee you’ll have a great jump on the perfect compost for spring:
Step One: Keep it moist. Freezing and thawing dries out the top level of your compost pile. To keep it moist run water along the top and mix it in when adding your next batch of scraps. Your pile should be damp not soaking.
Step Two: Keep it warm. Placing your bin in a sunny spot will help keep it warm. If it gets really cold, insulating your bin will ensure that your system stays alive. Microorganisms account for most of the decomposition activity and severe cold can kill them. If you have straw hay bales leftover from Halloween, these work great as insulators. Simply stack the bales around the outside of your bin. Snow can also be used as additional insulation. In the bin it’s best to place a layer of loose straw or leaves on top of your food scraps for additional protection.
Step Three: “Fuel”. While it may seem difficult to add scraps in the middle of winter, adding fresh waste materials will keep your system going through spring. Collect your scraps indoors in a bucket and bring them out at least once a week (kitchen scraps, coffee grounds, eggshells). You can also add in shredded paper. Note: If you don’t have a bin, try digging a trench and using the ground’s stored heat as a buffer. Cover the top with straw and a tarp.
Rain barrels and compost bins are two great and popular choices for your conservation efforts. But, there are so many more conservation aid tools available to you. Perhaps not as well known, their impact makes a difference.
Here are just a few of the simple and easy to use items you may want to consider:
5-Minute Shower Timer – Save water, energy and money. Take shorter showers, because every drop counts!
Water Leak Detection Tablets – Undetected running toilets are more than a nuisance. They waste gallons upon gallons of
water and cost you money. The simple use of a detection tablet in your toilet’s tank is an easy and inexpensive safeguard.
Rain Gauge – A rain gauge is used in your garden to more accurately measures precipitation. By measuring rainfall you can then estimate the additional water requirements necessary to keep your garden properly hydrated. Here again, it’s an easy and inexpensive tool to make your water conservation efforts more successful.
One last thought; Are your children, even toddlers, getting tuned into their lifelong journey to be good conservationists? Look into getting activity books and water conservation education wheels. They are fun and informative tools meant to start the next generation off on the right path.
Sources: blog.epa.gov, hgtvgardens.com, ecocycle.org, compostguy.com, fullserviceaquatics.com
Image: Cornelia Kopp


